
Tags
brewing, homebrew, homebrewer, homebrewing, pizza, pizza dough, Sourdough, spent brewing grain, spent grain
 Let’s call it “growth”. As I’ve been cooking over the past decade, I’ve found ways to do things better. For a while, I thought it was cheating to do a whole blog post on something that was really just learning a better way to do something that I’d already written about and I would make notes in the old posts about those things. But realistically, nobody goes back and read things a second time and there is no notification when I update posts so nobody is getting the benefit of the knowledge that I’m beating out of the universe and that’s the second reason for having this blog (The first is to make it easier for me to cook).
With that as introduction, here is the version of pizza dough that I’ve come to 7 years after my original post. I’ve moved from using packaged yeast to a sourdough starter, and replaced about 15% of the flour with spent beer grain flour (SBGF) Also, the process has changed significantly. This dough comes out slightly wetter than the original and the resulting crust is slightly darker, but it tastes better. Last weekend my wife’s parents came over for a socially distant dinner on the deck and we ordered a pizza from one of the local mid range restaurants ($15 for a 14″ pizza) last weekend in an effort to support the local neighborhood economy so there would be someplace to go after this whole pandemic shit show is done. My in laws raved about the pizza. It was definitely good, but my daughter and I agreed that the crust was not as interesting as mine.
This still freezes as well as the original and this recipe still makes enough for four 14″ pizzas. Please note that I have changed the sugar element but the same admonition from the original recipe holds true: use anything you want. Molasses, sugar, turbinado sugar, brown sugar, whatever kind of honey, agave syrup, maple syrup, … I’ve tried them all. They each add a very subtle change in taste but it’s not something you would notice unless you were really hunting for it.
Equipment:
- Measuring cups
- Stand mixer with dough hook
- Clean dish towel
Ingredients
- 1 cup sourdough starter
- 2.25 cups of water
- 1 tablespoon avocado honey (This is honey that bees make when they are taken to pollinate avocado orchards. It is really dark in color and has a very interesting spicy finish. I also use it quite a bit in brewing beers.)
- 4.5 cups bread flour
- 0.5 Cup spent brewing grain flour (SBGF)
- 2 tablespoons coarse sea salt (You could use half this volume of fine sea salt, but you should avoid salt that container iodine as it’s bad for the yeast.) I use smoked sea salt that I make when I am smoking steelhead, salmon, or pork shoulder. You can also buy smoked salt but if you’re smoking stuff, I strongly recommend buying a small, oven safe bowl and putting some salt in there while you smoke your food. You can buy smoked salt at specialty stores, but 2.2 lbs of coarse sea salt from Whole Foods is $2.49. I mean, if you’ve got money to burn, send me $22.49 plus shipping for a 2.5 lb package to your house and I’ll send you 2.2 lbs of coarse smoked sea salt.
Serves: Makes 4 14″ pizzas worth of dough to feed 12 people, 6 olympic athletes in training, or 3 stoned people (not sure that’s as funny as it was 7 years ago since pot is now legal in so many places).
Time: Takes a minimum of 24 hours though the vast majority of that time is spent waiting, sleeping, and drinking. Or just drinking if that’s how you roll (please drink responsibly).
Process
- Put 1.5 cups of bread flour, the SBGF, the honey (or whatever sugary stuff you are using), the sourdough starter, and the water in the bowl and mix using the dough hook or the paddle mixer. I usually do this immediately after dinner on Saturday evening while my daughter is practicing violin or piano.
- Cover with plastic wrap or a clean dish towel and put in the refrigerator for at least 12 hours. This will allow the starter time to get going, but the cold temperature will make the yeast work harder which will produce better flavor.
- Remove the mixer bowl from the refrigerator and let it sit on the counter for at least a half an hour. This is something I usually do before my daughter and I leave for the farmer’s market on Sunday morning.
- Put the bowl back on the mixer and attach the dough hook.
- Turn on the mixer to the mix setting and then add the remaining bread flour a half a cup at a time When you have added all of the flour, add the salt.
- Allow the mixer to knead the dough for about 8-10 minutes. The dough should end up tacky, not sticky and gooey. Sometimes I have to add a little more flour and I usually start by adding some SBGF and then some bread flour.
- While the dough is kneading, flour your work surface. Ordinarily, I would say do a light flour, but goa little heavier than you would normally. And keep the flour handy in case you find you need more.
- Transfer the dough from the mixing bowl to the floured work surface. I usually use a bench scraper or a dough scraper for this, but realistically you can use anything with an edge, it’s just a question of safety and efficiency.
- Let the dough flatten on its own a little bit, then take the top edge and fold it over the whole of the dough ball toward you. Then grab the left edge and fold it over the whole dough ball, then the same with the right edge, and finally the bottom edge. You are essentially making a dough envelope. Now roll the whole thing over so that the smooth side is facing up.
- Cover with a clean dish towel and walk away for an hour or so. I’ve spaced and let it sit for three hours once and it did no harm.
- When you come back, you will find the dough has grown. Repeat steps 9 and 10 twice each. If you have the counter space for it, this is also a good time to make pasta to freeze for the week ahead.
- Cut the ball of dough into 4 quarters.
- Put the quarters in 1 quart freezer bags and store. There is no need to form them into neat balls, but if that makes you happy, go for it. I usually put one in the fridge for that week, and the other three in the freezer for later.
Dough can be frozen for up to a month or left in the fridge for 5 days or so. Always let it warm to room temperature before you start working with the dough. It takes about 5 hours for a frozen ball of dough from this recipe to thaw. I usually take the dough out of the bag and let the yeast breathe as they wake up. I don’t know if that helps or not, but if I was being taken out of cryogenic storage, I think a bit of fresh air would be nice.
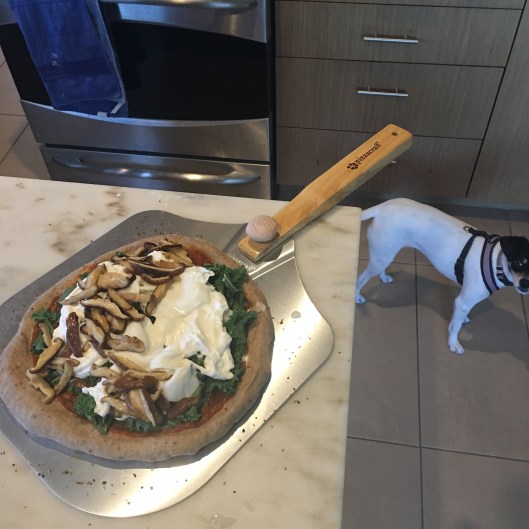
As always, how you top the dough is up to you, the options are pretty much infinite. My daughter’s current favorite is artichoke hearts, leftover roast chicken, and chèvre. I’m a fan of honey and arugula, for a while we were doing curly kale and sautéed shiitake mushrooms (see picture above, my daughter does not like mushrooms), … you do you. But whatever you put on it, 550º for 11 minutes with on preheated pizza stone, 12.5 minutes if you put it on a cookie sheet. And don’t put raw meat on a pizza.
